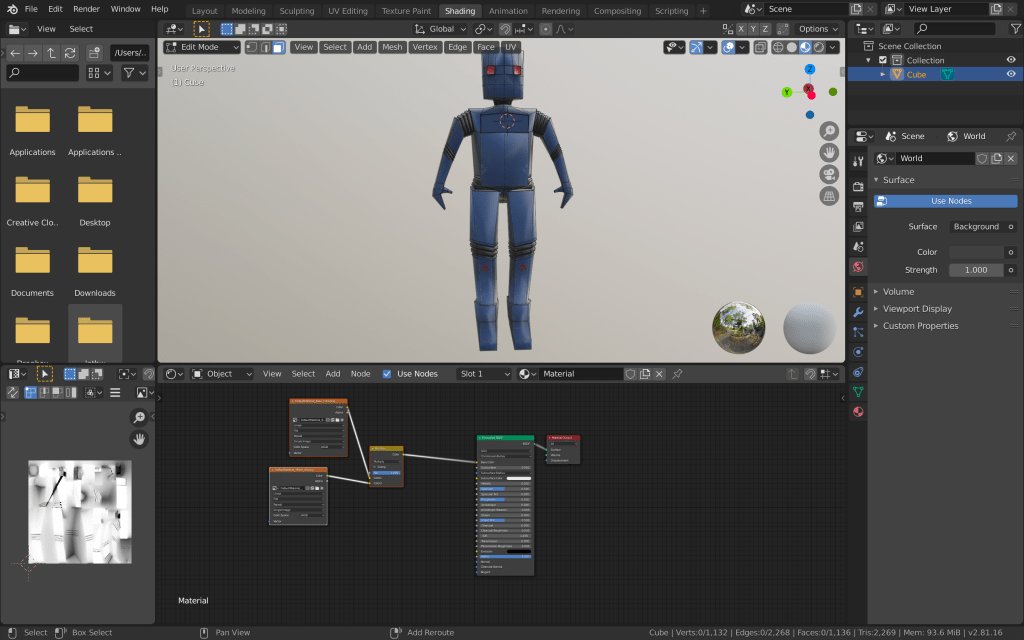
After I was done with most of the props that I have to do according to the plan, I moved on to creating one of the most important parts of our game. The npc would play a vital role in this game, as it is one of the major elements that are stopping the player from achieving his task. After a lot of research on non playable characters, I have learnt many things that I should include in my npc. I have to create a robot which is going to guard the premises of the mansion. His role is going to be patrolling outside and inside the mansion and engaging in combat with the player on different occasions. The first step is to create the model of the robot. I once again used blender for the 3D modelling. One thing to keep in mind while doing this, is that this model is going to be very low-poly. I won’t go in much details of the character and I am going to stick to sharp edges where possible, in order to recreate the image of robot cliche, as it is seen in most movies and some old school games.
I started by cutting the cube mesh in half and applying the mirror modifier to it. This way I am going to save a lot of time and avoid asymmetry, by having to create only one part of the character’s body. I used the cube for the torso of the robot. I then extruded the cube and added loop cuts, so I have more vertices and edges to work with. I formed the torso and then started adding the legs and arms by extruding the faces from the torso.
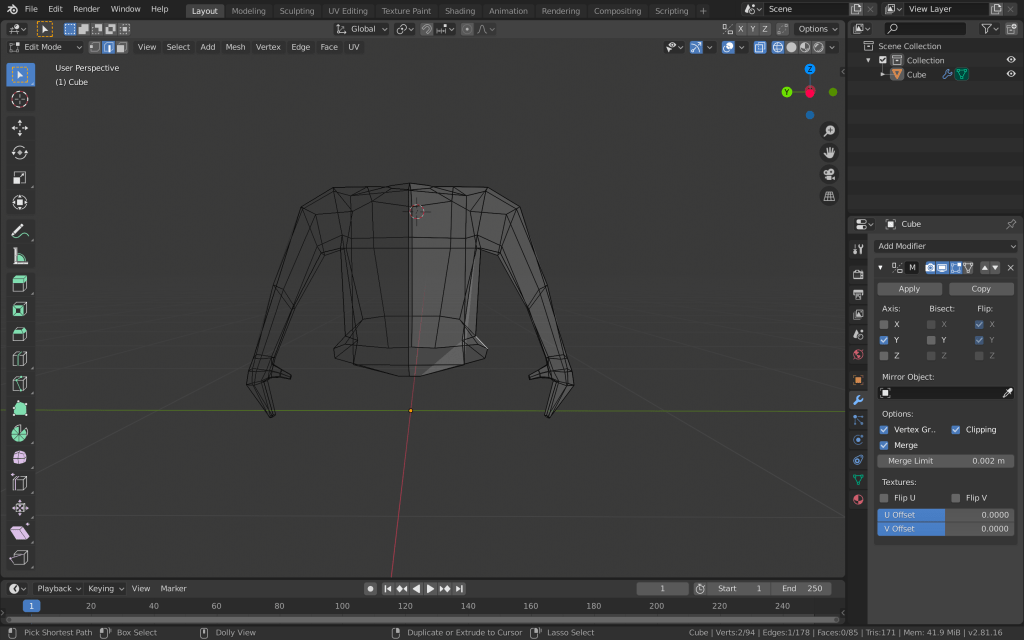
I created simple arms and hands with just a thumb and no individual fingers, since he is going to ahold a gun. I created the legs with extruding the two bottom faces, adding loop cuts and scaling them for the knees, and extruding and joining edges for the feet.
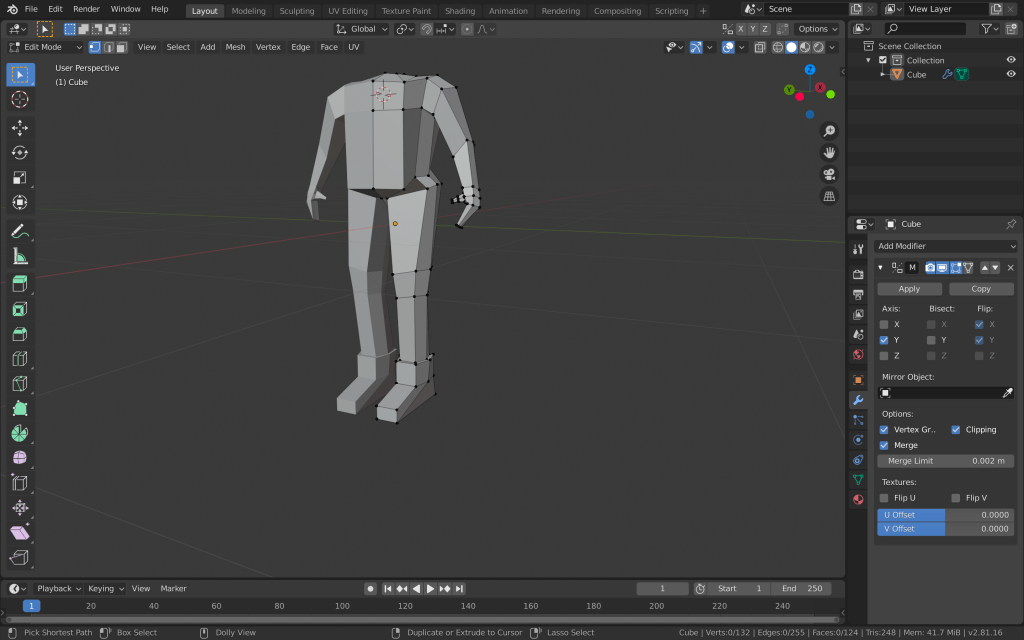
I added another cube mesh with a subdivision surface modifier for the head. I cut it in half and added the mirror modifier to it as well. I formed the head how I wanted it to be and deleted the bottom faces. I then deleted the top faces of the torso, made a circle with the vertices and extruded the edges to make the neck. After that I joined the two objects and then joined the edges of the head with the edges of the neck.
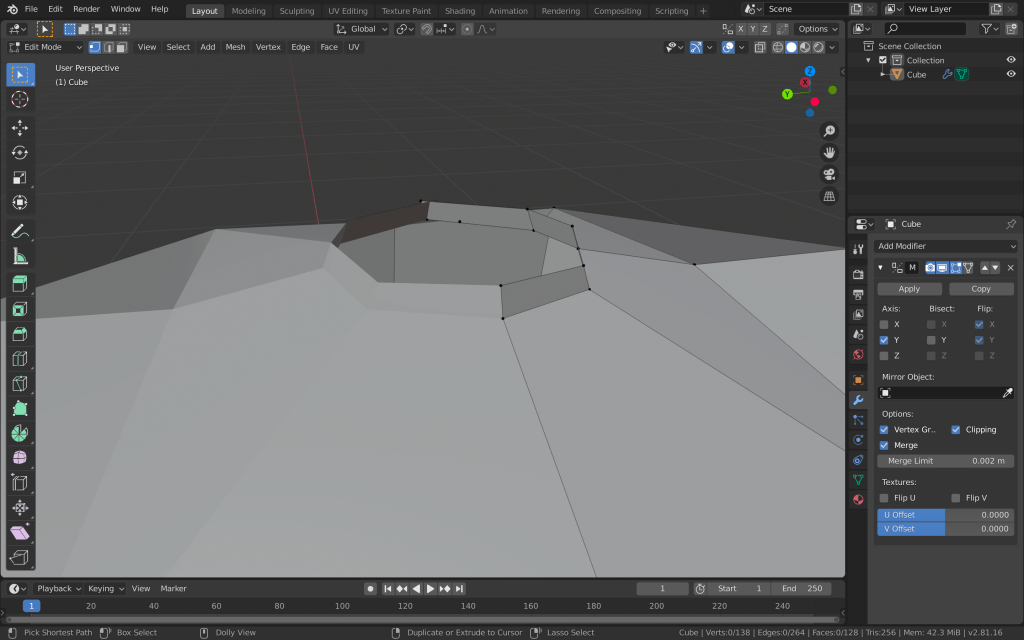
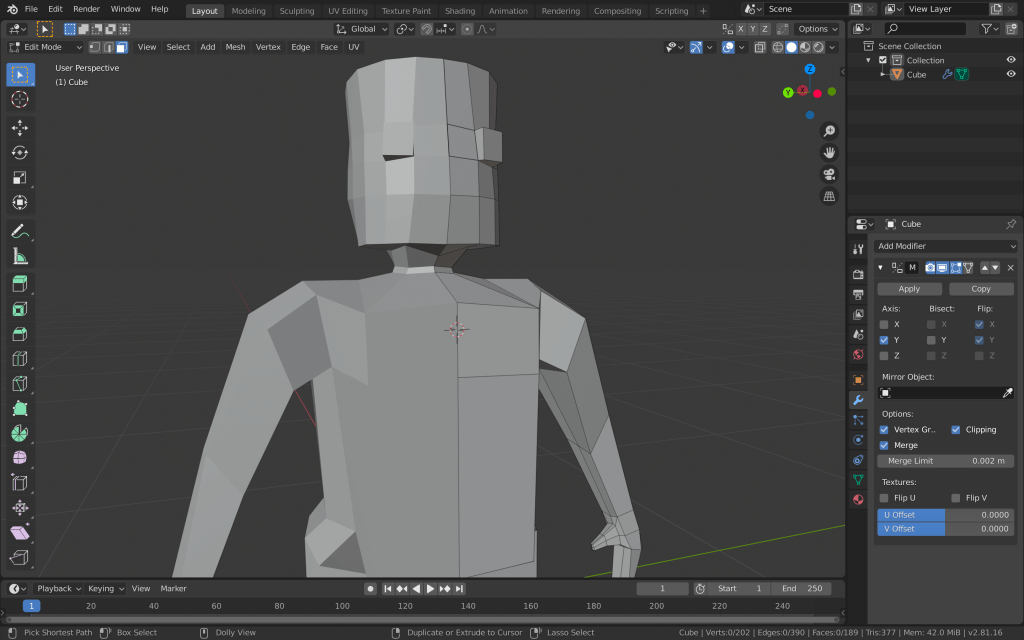
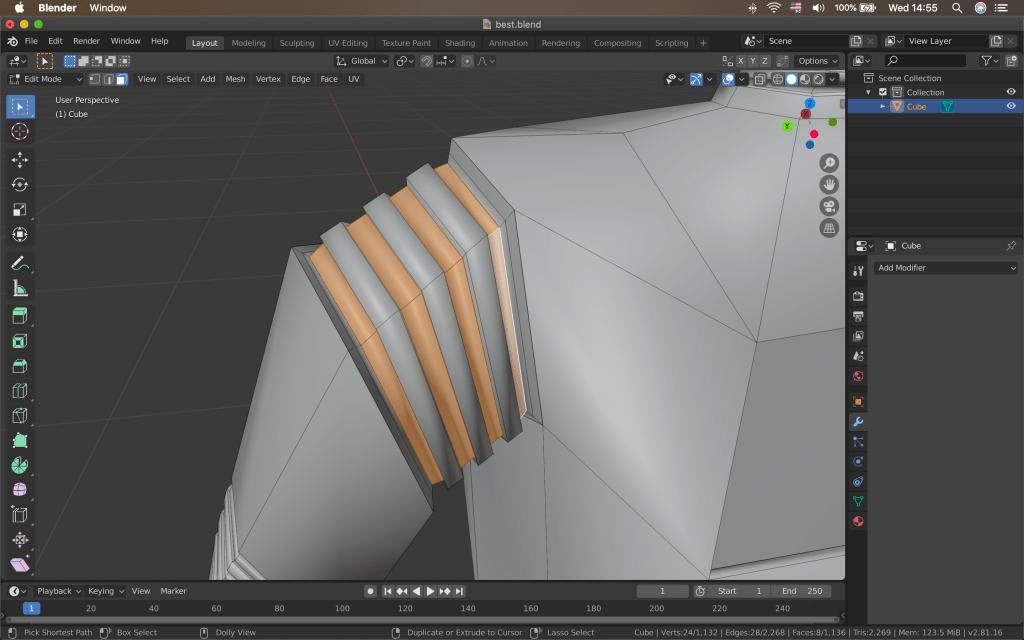
I also wanted to add rubber tubing-like forms to the “joints” of the robot. I added multiple loop cuts to these parts, selected every second face that was created, extruded them and then scaled them down.
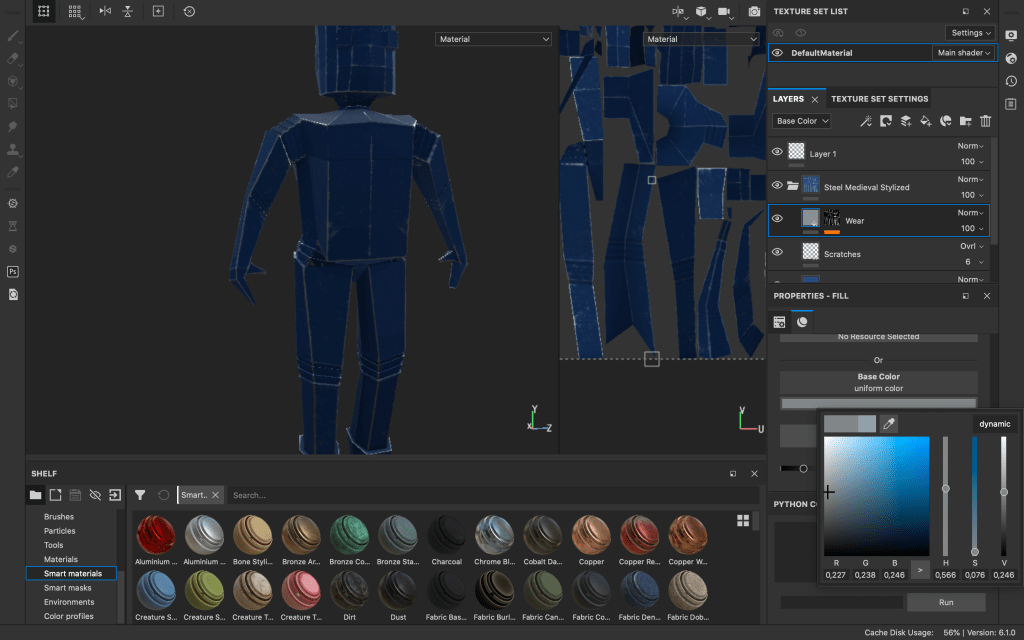
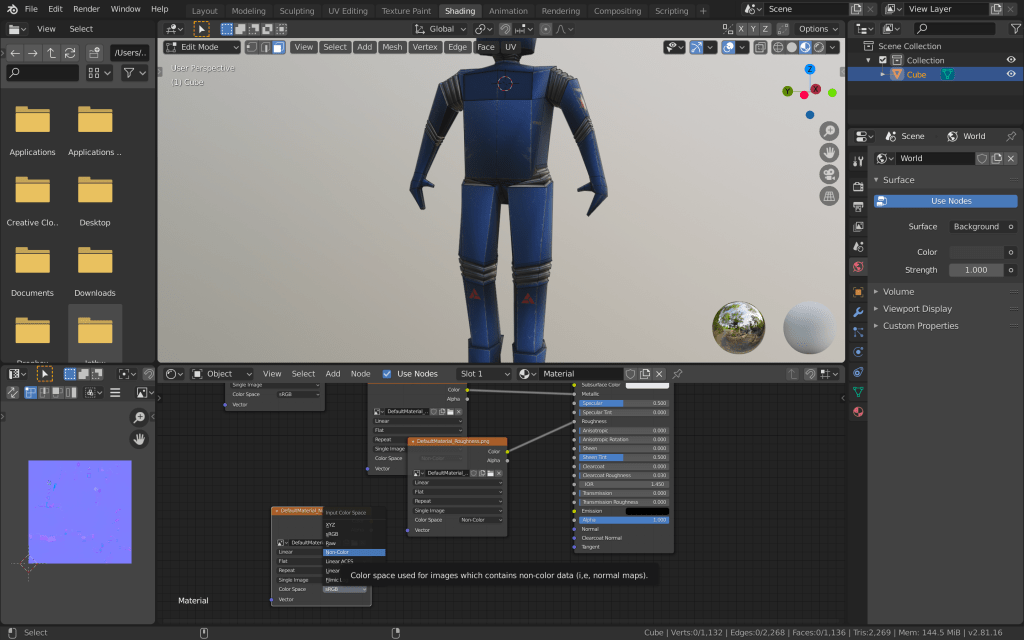
After adding a bit more details, I was done with creating the model of the robot. I then moved on to texturing the npc. I have decided to use substance painter for this purpose, since this is a very important game object and I could take advantage of the advanced texturing options substance painter offers. I unwrapped all of the model’s faces with smart UV project and imported everything to substance painter.
From there I selected a steel smart material and added it to the layers. I changed the base colour and the wear and scratches intensity, colour and roughness.
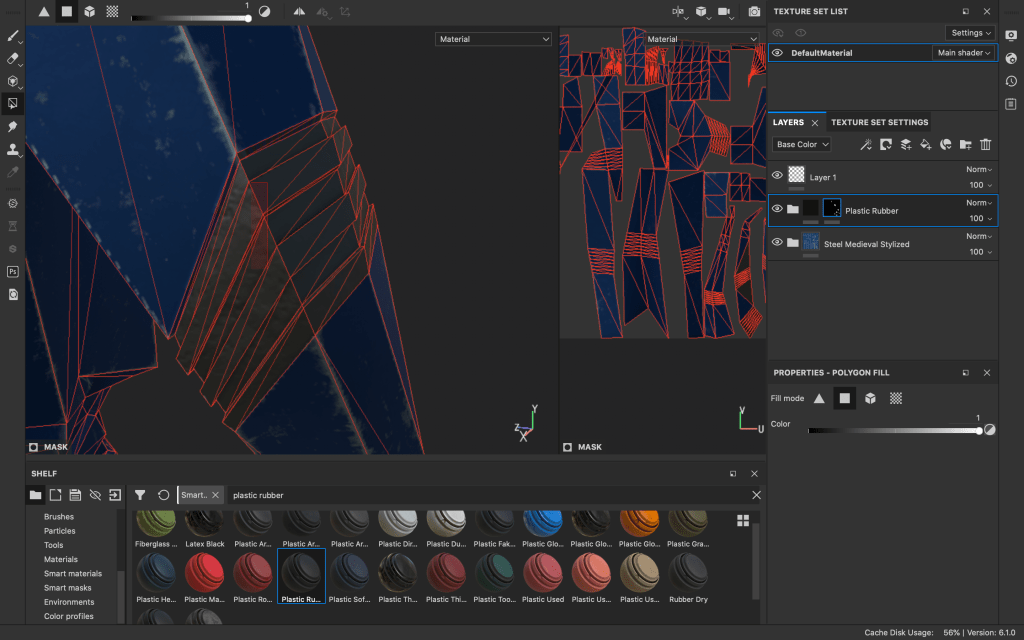
I also wanted the “joints” I made to have a different material, so I added another layer with a plastic rubber material. However, this covered the whole mesh, so I added a black mask to the new layer. Then, I selected polygon fill and filled only the parts, which I wanted the new material to cover.
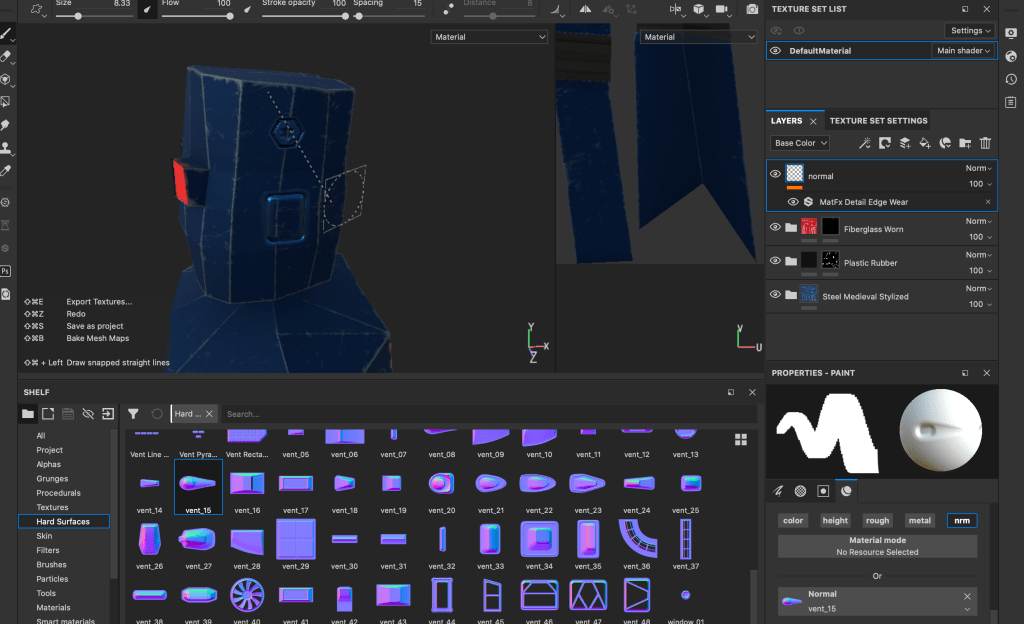
I did the same for the material, which I used for the eyes of the robot. After that, moved to adding a bit more details, like text and decals. For this purpose I added a new layer after the scratches and wear layers of the base steel material. This way the new graphics I add would fit with the texture of the robot and would also have the same imperfections.

After adding the alpha stamps, I added another layer, which I am going to use for adding more detail and hard surface elements to the normal map of the robot.
After I was happy enough with how the robot looks, I exported the textures from substance painter. After that I went in blender again and started adding the textures using nodes, different mixers and multipliers and applying the correct settings to the different maps.
I checked again if the textures are as they should be and exported the mesh and the textures to unity to check if everything is correct.
